
After the Christmas break, we’re making good on our promise and starting to build our own aquarium. In this part, we’ll cover setting up the virtual machine, Ubuntu Server, and the basic installation of Barracuda and an Octopus instance.
All steps were performed and tested on Mac OS 10.8. The influence of the host system is relatively minor, so the tutorial should be applicable to other operating systems with slight adaptations.
Virtual Machine
First, we need a virtual machine with Ubuntu Precise Server as its operating system. To do this, we first download the Ubuntu Server 12.04.1 LTS image and some virtualisation software. I use Parallels Desktop for Mac, but in principle, everything should also work with VirtualBox or VMWare.
Then, create a virtual machine and install the operating system. Most people tackling this tutorial have probably done something similar before, so we won't go through every step individually. If in doubt, there are plenty of guides available online. Just keep a few important points in mind:
- The operating system should be installed in English. Otherwise, you might encounter some interesting errors, as the Barracuda script partly relies on this.
- The network settings should be configured so that our machine receives a fixed IP address. This can be achieved in various ways depending on the virtualisation software. In Parallels, the standard settings suffice for this. Although they also work via DHCP, Parallels always assigns the same address to a machine.
- We don't need any additional packages; the system should be completely bare. Only OpenSSH is practical at the start if you don't want to perform the initial steps in the somewhat unwieldy default shell.
- All GUI packages can also be omitted. While Barracuda does work with them, they consume RAM during operation and aren't strictly necessary.
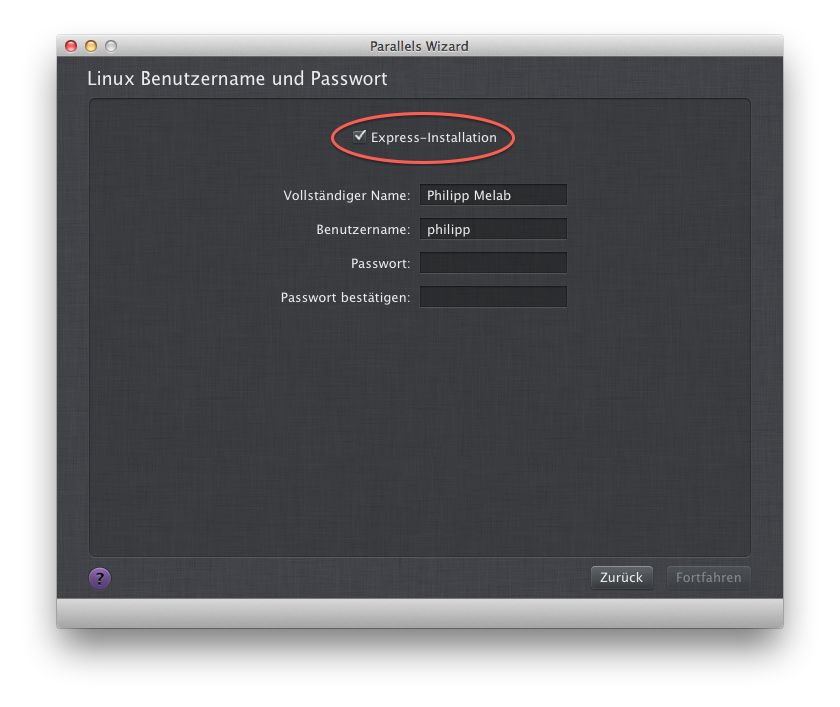
- Parallels offers an “Express Installation” for Ubuntu. We will not opt for this, but rather do everything ourselves to ensure the points mentioned above are adhered to.
After completing the installation process, ideally, you should see the login prompt, which you feed with the credentials you chose previously. Ubuntu does not allow root login by default. Instead, the account we created during installation has sudo rights. So, we simply type sudo su into the command line, respond with the same password as for login, and we're in the root shell, where we'll continue working from now on.
DNS Setup
Aegir no longer supports subdirectories. Each site requires its own domain. In principle, we could make an entry in /etc/hosts every time, but this becomes cumbersome with many sites, so we need a better solution.
Option 1: xip.io
xip.io is a free service from the clever minds behind 37 Signals. The principle is simple. A special DNS server intercepts all requests to xip.io and resolves them to an IP address within the subdomain. For example:
- 192.168.1.10.xip.io points to 192.168.1.10
- mydevsite.192.168.1.10.xip.io also points to 192.168.1.10
This would be a solution with no effort required. However, the disadvantages are primarily the somewhat unwieldy long domains, and the fact that you need internet access to reach the Virtual Machine. This can be annoying if you're working on the go.
Option 2: dnsmasq
It would be far more practical if we had a Top Level Domain that always points to our test server. And to keep everything neatly packaged, this should also act as a DNS server. Barracuda actually includes an integration for bind9, but this is too complex for our use case. Instead, we install dnsmasq:
apt-get install dnsmasqAnd edit the following files with our chosen editor – meaning vi –
/ETC/DHCP/DHCLIENT.CONF:
Here, we look for the line prepend domain-name-servers 127.0.0.1; and ensure it is not commented out, or rather, insert it at line 20, after supersede domain-name "fugue.com home.vix.com";. This instructs the network configuration to query our internal DNS server by default.
/ETC/DNSMASQ.CONF
Here we configure dnsmasq itself. Specifically, we make a fixed address entry. At line 62, we should find an example:
#address=/double-click.net/127.0.0.1We copy this and change it so that the Top Level Domain .bcd (short for “Barracuda”) points to our static address (in my case 10.211.55.12).
address=/bcd/10.211.55.12Caution: Instead of bcd, you can, of course, use any other invented Top Level Domain. However, popular candidates like .local or .private are already used by OSX for internal services such as Bonjour. This can lead to interesting problems and should therefore be avoided.
After restarting dnsmasq…
/etc/init.d/dnsmasq restart…running dig irgendwas.bcd should return, among other things, the following Answer Section:
;; ANSWER SECTION:
irgendwas.bcd.      0   IN  A   10.211.55.12
This means the DNS server is running and is at least reachable within the Virtual Machine. However, we also need it to be accessible from outside. To do this, we go into a shell on the host system and again look for:
dig irgendwas.bcd @10.211.55.12This should again result in the same Answer Section. So, we know that the DNS server is also accessible from outside; now we just need to ensure that the system uses our new DNS server. On OSX, this is done in the settings for the currently active network adapter in the DNS tab.
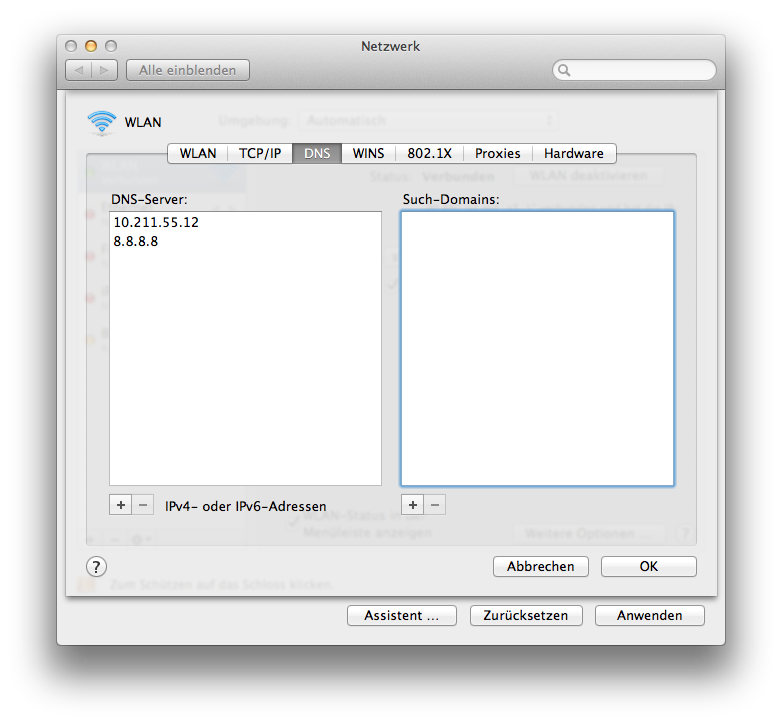
Unfortunately, the solution is not optimal, as you have to overwrite the default settings, and if you use several different adapters and environments, you'll have to enter it multiple times. It becomes problematic with networks that have their own DNS servers, which then suddenly stop working. If anyone knows a more elegant method, I'd appreciate any pointers!
Sometimes, the new DNS entries are not immediately taken into account, or are not updated after errors. On OSX, you clear the DNS cache with the following command:
sudo dscacheutil -flushcacheOften, this is not enough, as DNS queries pass through mDNSResponder – part of Bonjour – which also caches them. In this case, dig provides the correct result, but ping still claims not to know the host. To solve this problem, you kill the responsible process so that it restarts on the next call. Not pretty, but whoever causes so much confusion deserves it.
sudo killall -HUP mDNSResponderEdit: The hints have arrived. There is a (relatively) simple and elegant solution on OSX. You create a subdirectory resolver in the /etc folder, and then create a file named bcd (without extension) inside it with the following content:
nameserver 10.211.55.12This registers a new DNS resolver and uses it for all domains ending in bcd, without interfering with the normal network configuration.
Barracuda and Octopus
At this point, we have a Virtual Machine that listens for domains ending in .bcd. So, we are ready to set up Barracuda itself.
The official instructions advise using the meta command boa, which provides ready-made configurations for local and public servers. However, both don't quite work in our setup, so we'll take the slightly longer route and configure it ourselves.
First, in our virtual machine, as the root user, we download the two installation scripts:
wget -q -U iCab http://files.aegir.cc/BARRACUDA.sh.txt
wget -q -U iCab http://files.aegir.cc/OCTOPUS.sh.txt
Barracuda Installation
Then, we install the necessary software and the master instance. To do this, we edit the recently downloaded file BARRACUDA.sh.txt. It contains a lot of options, all very thoroughly documented. One should at least skim through them; much will explain itself. The following points should be noted:
- _MY_EMAIL: I'll leave finding the correct value for this to common sense.
- _EASY_LOCALHOST and _EASY_PUBLIC must be set to NO.
- If you do not plan to support Drupal 5, a value of 5.3 for _PHP_FPM_VERSION and _PHP_CLI_VERSION is recommended with a view to Drupal 8 support.
- _XTRAS_LIST: For our setup, CSF (Firewall) and PDS (DNS cache) are not necessary and only represent potential sources of error – so remove them. Instead, we'll include CSS (Compass Tools) and SLR (Tomcat + Solr).
- Ideally, the script automatically detects the domain and IP address. If you receive error messages regarding FQDN and address resolution, you can populate _MY_OWNIP, _MY_HOSTN and _MY_FRONT with the corresponding values and possibly set _DNS_SETUP_TEST to NO.
After editing the file and checking it multiple times, run the script with bash BARRACUDA.sh.txt and grab a coffee or an alternative hot drink to pass the next few minutes.
Provided the process wasn't aborted due to some error, the system will output a one-time login link. This can always be found in the file /var/aegir/install.log. We use the link and set an admin password, but we won't be using the master instance any further.
The Octopus Instance
In the second step of the installation, we create an Octopus instance for our development system where we will then work. Theoretically, it would be possible to generate several, but in our case, that only makes limited sense.
The file OCTOPUS.sh.txt is broadly quite similar to BARRACUDA.sh.txt:
- We set _USER to a convenient username like dev, development or masterofdisaster. For simplicity, we will assume dev in the following steps.
- _MY_EMAIL and _CLIENT_EMAIL can contain the same address, again dictated by common sense.
- PHP versions and DNS setup are best configured analogously to
BARRACUDA.sh.txt. - _PLATFORMS_LIST contains a list of Drupal distributions that are automatically installed and updated for this Octopus instance. If you want to experiment and are prepared for a longer installation, you can go wild here. Of course, you can also install distributions manually later.
We run the file again with bash OCTOPUS.sh.txt and have our second coffee for the day. If all goes well, we'll get another login link, this time to our actual Aegir interface. This too can be found in a log file: /data/disk/dev/log/install.log.
The installation also automatically sends an email with further instructions to the email addresses noted in OCTOPUS.sh.txt. If this doesn't arrive, you can also find it in /data/disk/dev/log/setupmail.txt. The FTP access data is particularly important for the next step.
The First Platform
If everything has worked up to this point, we are about to install our first Drupal website. To do this, we log in using the FTP access data with any FTP client and navigate to the static directory. This is reserved for custom platforms, i.e., Drupal distributions that Barracuda does not touch during an update. There, we create a directory my-drupal and fill it with the latest Drupal version.
Then we return to the Aegir interface of our Octopus instance and create a new platform named My Drupal using Content Management » Create Content » Platform (at the top of the administration bar). It is important that the path displayed under the platform name matches the one in the file system.
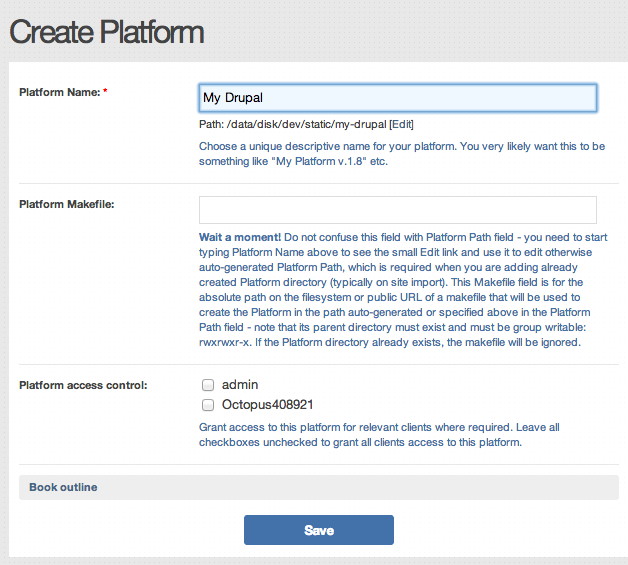
After saving, it takes a little while for Aegir to verify the platform. Afterwards, we can create a new site using the Add Site tab. We give it any domain that ends in .bcd and, confusingly, choose an installation profile first and then a platform where it is available. In our case, this should initially be Standard and My Drupal. If you installed several distributions at once, they should also be available for selection.
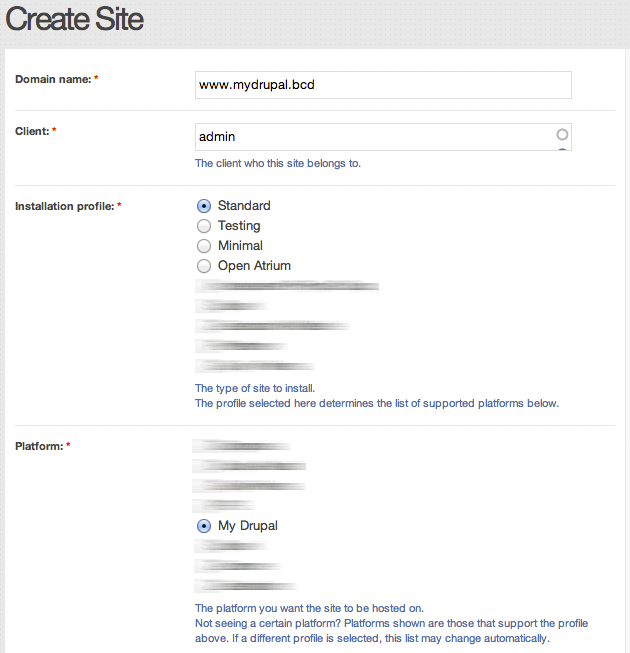
After saving, Aegir again takes a little while to install our new site; then the Admin Interface directly provides us with the current status of the site and a one-time login link.
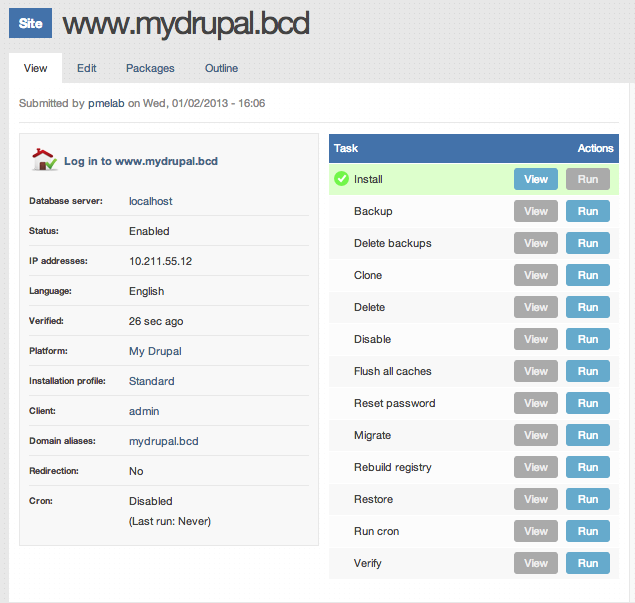
We can now repeat the last steps as often as desired to install further platforms, distributions, and sites. Within my-drupal (and all other platforms in static), we can also add modules and themes as usual.
That wasn't all!
So far, we've had a great exercise in server and DNS configuration, but it hasn't significantly simplified life as a developer yet. In the next (and probably final) part of this blog series, I'll delve into some tips, tricks, and pitfalls surrounding the development process within Barracuda and Aegir. So, the best is yet to come!